I am currently learning how to create Android apps using Kotlin, and today I exploring how to send push notifications!
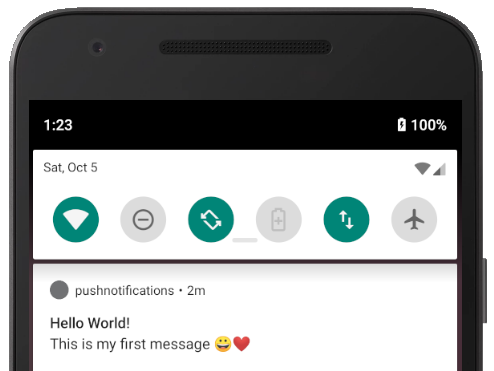
The goal of this guide is to build a simple Android app and send a “Hello, world” push notification. The end result will look something like this
What are push notifications?
Push notifications are messages that are sent from an app publisher to the users of the app, and usually shows up in the system tray. The user doesn’t have to have the app opened in order to do so (in fact, some many notifications only show up when the user is not in the app). Push notifications can be used for many things, both good and bad.
Example of notifications
- Your taxi has arrived
- A friend has sent you a message in the app
- Your local team just scored
- There is a sale on your favorite food
Read more about push notifications here.
Creating the app
I really had no idea how to create push notifications for Android apps, but it turns out Google has done a stellar job simplifying the setup. Especially if you are using Android studio, and choose their Firebase Cloud Messaging (FCM for short). I followed this Google guide, see steps in next section.
Note 1: FCM also works with iOS. Guide here.
Note 2: FCM can be used for sending messages in general, not just push notifications for the mobile phones. It also works on the Web (using javascript), C++ and Unity.
Setting up in Android Studio + FCM
I used Option 2 from this guide from google to setup FCM in Android Studio, using the Firebase Assistant.
Go to Tools —> Firebase and click Cloud Messaging and start the wizard
- Click Connect your app to Firebase
- Add FCM to your app
- Create the service described in step 3 Handle messages by
- File > New > Service > Service
- I named mine MyMessagingService
- You can skip the
onMessageReceived()for now. To simplify things, we will only receive notifications when the app is in background mode
package cafe.gophers.pushnotifications

import com.google.firebase.messaging.FirebaseMessagingService
import android.util.Log
import com.google.firebase.messaging.RemoteMessage

class MyMessagingService : FirebaseMessagingService() {

    val TAG = "Firebase Messaging Svc"

    override fun onNewToken(token: String?) {
        Log.d(TAG, "Refreshed token: " + token!!)
    }

    override fun onMessageReceived(remoteMessage: RemoteMessage) {
        // Not needed yet
    }
}
Save the FCM Registration Token
In order for FCM to know which mobile to send the notification to, we need the FCM Registration Token. Whenever a new token is created, the method onNewToken(token: String?) above is called. For now, we can retreive the token by logging it to Logcat. Build and start the app, and you should see something like this in the log:
D/Firebase Messaging Svc: Refreshed token: edMi2AGjEDk:APA91bFUddgbBAORuG7_2AByF6uptYTunk6alvb5a4R2vNninp...
Copy the full token (it should be a lot longer the one above), and save it for later. If you lose it, you have to remove the application from your phone/emulator and reinstall it.
That is is, codewise! Now we just need to send the notification.
Sending the notification
To send a test notification, we go the firebase console
-
Click the project you set up in the previous step. In my case “pushnotifications”
-
Click Cloud Messaging
-
Click the button at the top Send your first message
-
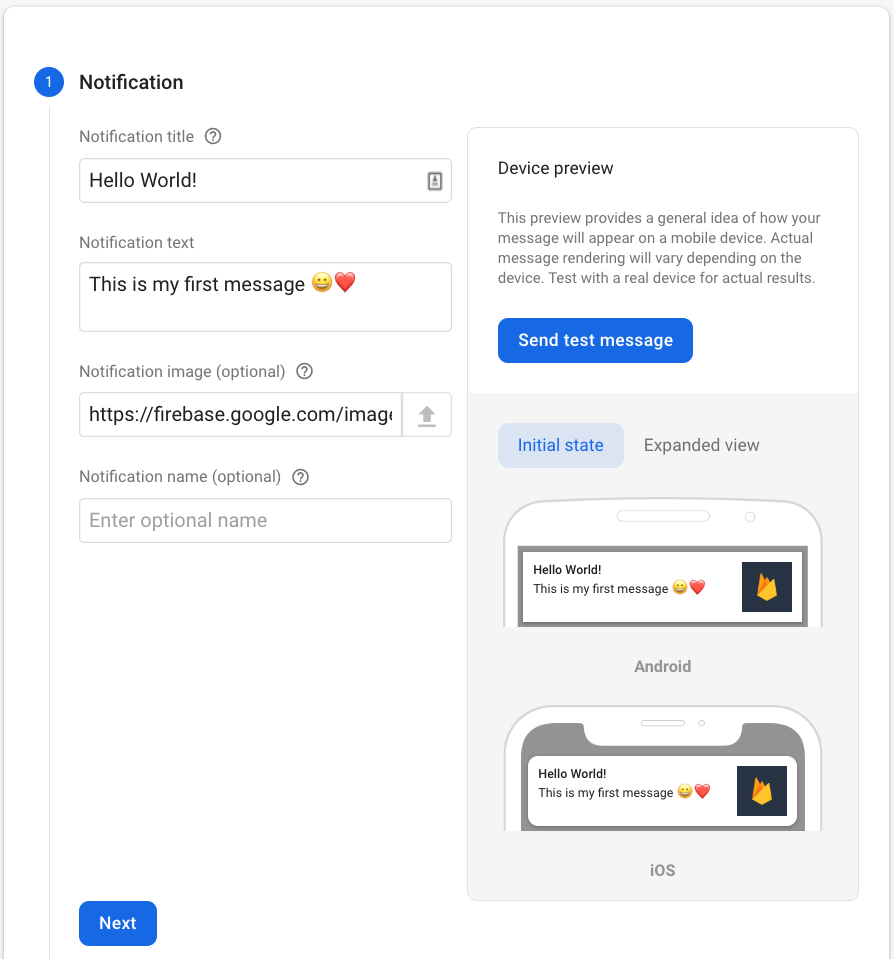
Fill in the form to create your notifications (emojis copied from here).
-
Click Send test message
-
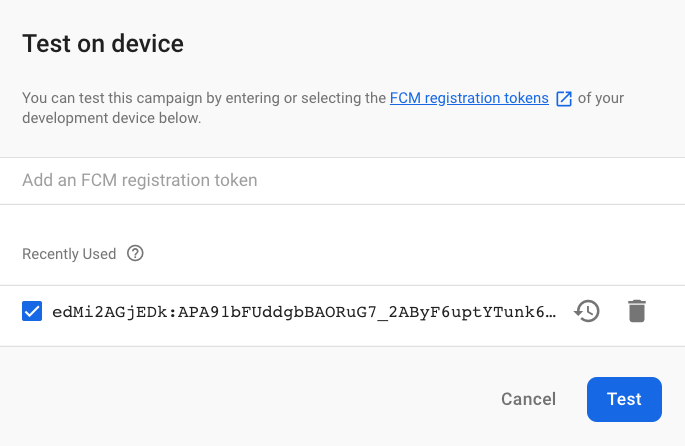
Add the FCM registration token from the logs (see the previous section)
-
Press test button (Note: the application MUST be in background mode, otherwise the notification will not show up, since we have not implemented
onMessageReceived())
And voilá, I receive a nice emoji push notification. That is it for this introduction.
Possible improvements
There are several improvements that can be considered already.
- Show notifications when the app is active (in the foreground)
- Take the user to a specific view in the app when the notification is clicked (deep links)
- Make the notification permament (for example, while the user is logged in)
Code
The code for the push notification is background mode is here.