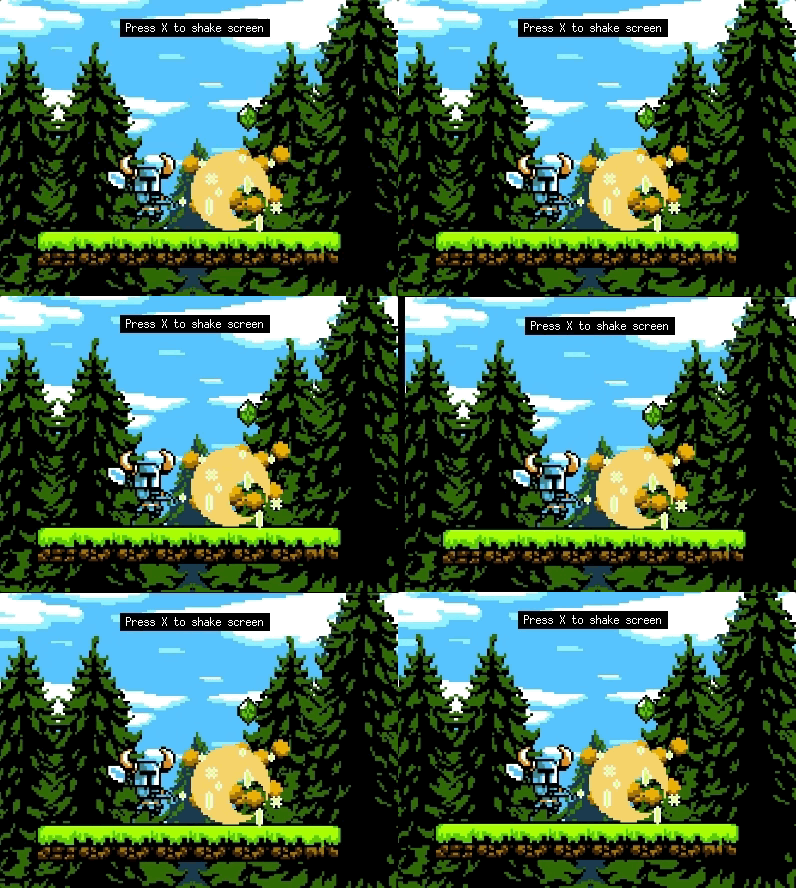
A good way of improving the feel of a game is to add screen shake, when a player gets hit or when something heavy lands on the ground. I have implemented two ways of doing this, one simple and one nice. The end result will look something like this

Screen shake?
First, let’s cover the question: what is screen shake?. The typical screen shake is created by adding an offset for what is draw on the screen in on the horizontal(x) and vertical(y) axes. The amount of offset (amplitude) usually decreases over time, in the example below I use linear interpolation (lerp) from 20 to 0.
// Simple offset
amplitude := 20 * gfx.Lerp(1, 0, t)
dx := amplitude * (2*rand.Float64() - 1)
dy := amplitude * (2*rand.Float64() - 1)
Let us use this code in full example.
Simple screen shake
The trick is to first draw our content on a temporary image (canvas), and then draw that image to the screen, with an offset. scene1 is an *ebiten.Image (see setup in my post about 2D transitions).
func simpleScreenShake(screen *ebiten.Image) {
   // Draw scene onto tmpScreen
   tmpScreen.DrawImage(scene1, &ebiten.DrawImageOptions{})

   // Draw tmpScreen on an offset (screen shake) applied, stop when t > 0
   maxAmplitude := 10.0
   op := &ebiten.DrawImageOptions{}
   if t < 1 {
      amplitude := maxAmplitude * gfx.Lerp(1, 0, t)
      dx := amplitude * (2*rand.Float64() - 1)
      dy := amplitude * (2*rand.Float64() - 1)
      op.GeoM.Translate(dx, dy)
   }
   screen.DrawImage(tmpScreen, op)
}
This function is called from the main game loop.
func update(screen *ebiten.Image) error {
   simpleScreenShake(screen, t)
   t += 1 / 60.0
   return nil
}
Easy! Let’s make it more complicated. Code for the easy shake is here.
Nice(r) screen shake
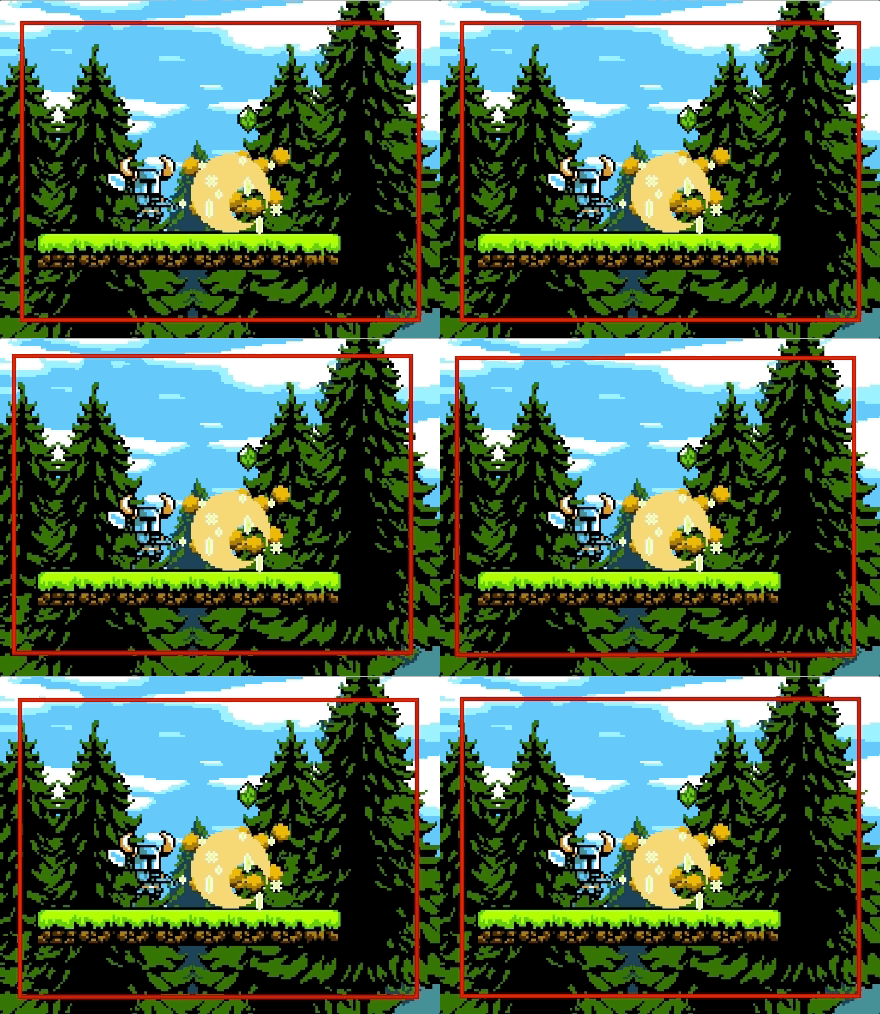
As you see above, we get a black border around the image when we shake. While it is not terrible, we can do better! What we want to do is something like the image below, i.e. draw more to the temp image than we will draw to the screen. Then we can draw the content of the red rectangle onto the screen.
func main() {
   ...
   // Create a screent hat is larger than our actual screen
   biggerTmpScreen, err = ebiten.NewImage(screenWidth+40, screenHeight+40, ebiten.FilterDefault)
   if err != nil {
      log.Fatal(err)
   }
   ...
}
func nicerScreenShake(screen *ebiten.Image, t float64) {
// Draw scene onto tmpScreen
biggerTmpScreen.DrawImage(scene1, &ebiten.DrawImageOptions{})
// Draw tmpScreen on an offset (screen shake) applied
op := &ebiten.DrawImageOptions{}
op.GeoM.Translate(-padding, -padding)
if t < 1 {
amplitude := maxAmplitude * gfx.Lerp(1, 0, t)
dx := amplitude * (2*rand.Float64() - 1)
dy := amplitude * (2*rand.Float64() - 1)
op.GeoM.Translate(-dx, -dy)
}
screen.DrawImage(biggerTmpScreen, op)
}This function is called from the main game loop.
func update(screen *ebiten.Image) error {
   nicerScreenShake(screen, t) // Previously simpleScreenShake(screen, t)
   t += 1 / 60.0
   return nil
}
Code for the nicer shake is here.