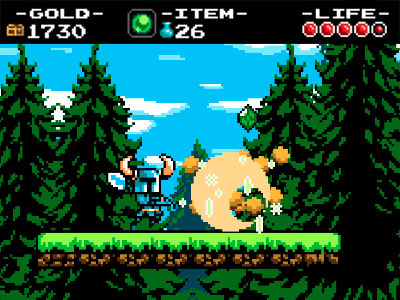
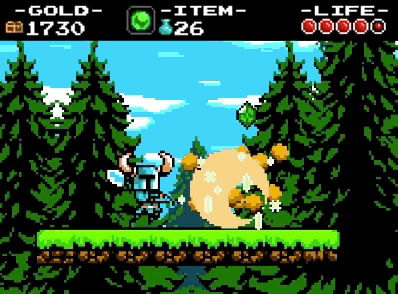
The other day, I watched a a playthrough of the 2D platformer Shovel Knight. It has a couple of nice screen transitions that I wanted to recreate using Go and the 2D game library Ebiten. Here is the end result:
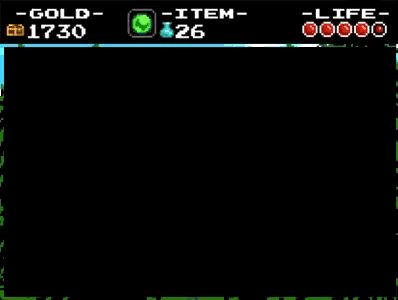
Note: I have borrowed the background images and scoreboard in the from Shovel Knight itself.
Setup
Before we can create transitions, we need some nice graphics to transition to and from. I took a couple of screenshots from the studio website.
As I want to be able compile the examples using GopherJS, I had to do a few extra steps:
- Save the images as
[]byteusing go-bindata- In my case
go-bindata -pkg shovelknightresources *.png
- In my case
- The images
[]byteare then accessed asshovelknightresources.Asset("scene_1.png") - Use my utility package magnuswahlstrand/ebitendrawutil to simplify the loading of the images
func main() {
    // Load resources
   scene1Data, err := shovelknightresources.Asset("scene_1.png")
   if err != nil {
      log.Fatal(err)
   }
   scoreboardData, err := shovelknightresources.Asset("scoreboard.png")
   if err != nil {
      log.Fatal(err)
   }
   scene1 = ebitendrawutil.ImageFromBytes(scene1Data)
   scoreboard = ebitendrawutil.ImageFromBytes(scoreboardData)

   // Start the Ebiten update loop
   if err := ebiten.Run(update, screenWidth, screenHeight, 1, "my application"); err != nil {
      log.Fatal(err)
   }
}
The following function draws the two images to the screen (full code here).
func update(screen *ebiten.Image) error {
   // Draw the scenes
   screen.DrawImage(scene1, &ebiten.DrawImageOptions{})

   // Draw scoreboard
   screen.DrawImage(scoreboard, &ebiten.DrawImageOptions{})
   return nil
}
Growing Rectangle
Let’s start with the easiest transition: a rectangle that expands from the center
The function below takes care of drawing and growing a rectangle from width and height = 0 to full size of maxRect. It uses a few utility strucs and functions from Peter Hellberg’s gfx package. Specifically:
gfx.Vec- representing a 2D point, or vectorgfx.Rect- representing a rectanglegfx.Lerp/Vec.Lerp- linear interpolation between two values or vectors
Note: ebitenutil.DrawRect is really intended for debugging
// TransitionGrowingRect draws a rectangle that grows from the center to fill maxRect as t goes from 0 to 1
func TransitionGrowingRect(screen *ebiten.Image, maxRect gfx.Rect, t float64, clr color.Color) {
   v := maxRect.Center().Lerp(maxRect.Min, t)
   w := gfx.Lerp(0, maxRect.W(), t)
   h := gfx.Lerp(0, maxRect.H(), t)
   ebitenutil.DrawRect(screen, v.X, v.Y, w, h, clr)
}
Then we add the following to our update function. maxRect is the rectangle we want to cover over time.
func update(screen *ebiten.Image) error {
   ...
   // Draw transition
   scoreboardHeight := 44.0
   maxRect := gfx.R(0, scoreboardHeight, screenWidth, screenHeight)
   switch step {
   case 0:
      TransitionGrowingRect(screen, maxRect, t, colornames.Black)
   }
   ...
   if t < 1 {
      t += 0.01
   }
   return nil
}
code for part two > here
Shrinking Rectangle
The growing rectangle is best as a transition out of a scene. To transition in to a scene, we want a shrinking rectangle. Lucky for us, this is trivial to implement. We just need to change the time-constant input from t to 1-t. It is questionable if this should even be it’s own function, but here it is:
func TransitionShrinkingRect(screen *ebiten.Image, maxRect gfx.Rect, t float64, clr color.Color) {
   TransitionGrowingRect(screen, maxRect, 1-t, clr)
}
Now we can transition for real between scenes. I have added a second scene "scene_2.png" and made the update function toggle between them.
Note: I have put TransitionShrinkingRect before TransitionGrowingRect in the second switch below.
func update(screen *ebiten.Image) error {
   // Draw the scenes
   switch n {
   case 0:
      screen.DrawImage(scene1, &ebiten.DrawImageOptions{})
   case 1: // NEW
      screen.DrawImage(scene2, &ebiten.DrawImageOptions{})
   }

   // Draw transition
   scoreboardHeight := 44.0
   maxRect := gfx.R(0, scoreboardHeight, screenWidth, screenHeight)
   switch int(t) {
   case 0:
      TransitionShrinkingRect(screen, maxRect, t, colornames.Black)
   case 1:
      offset := 1.0 // NEW
      TransitionGrowingRect(screen, maxRect, t-offset, colornames.Black)
   }

   // Draw scoreboard
   screen.DrawImage(scoreboard, &ebiten.DrawImageOptions{})

   t += 0.01
   if t >= 2 { // UPDATED
      t = 0
      n = 1 - n
   }
   return nil
}
code for part three > here
Shrinking/Growing Frame
Neither of the effects in the previous sections are actually in Shovel Knight, as far as I know. What we need is a growing/shinking frame!
For this I use my own util-package magnuswahlstrand/ebitendrawutil and especially DrawRect(). This draws a rectangle with a border and a transparent fill.
// TransitionGrowingBorder draws a border that expands inwards until it fills maxRect
func TransitionGrowingBorder(screen *ebiten.Image, maxRect gfx.Rect, t float64, clr color.Color) {
   min := gfx.MathMin(maxRect.W(), maxRect.H())
   ebitendrawutil.DrawRect(screen, maxRect, colornames.Black, int(t*min/2.0))
}

// TransitionShrinkingBorder is TransitionGrowingBorder run backwards
func TransitionShrinkingBorder(screen *ebiten.Image, maxRect gfx.Rect, t float64, clr color.Color) {
   TransitionGrowingBorder(screen, maxRect, 1-t, clr)
}
code for part four > here
Blinds
Last example I will add is a blinds transition, where several rectangles animates up to fill the target rectangle.
// TransitionBlinds draws n rectangles that expands up to cover maxRect  as t goes from 0 to 1
func TransitionBlinds(screen *ebiten.Image, maxRect gfx.Rect, nRectangles int, t float64, clr color.Color) {
   blindMaxHeight := maxRect.H() / float64(nRectangles)
   for i := 0; i < nRectangles; i++ {
      x := maxRect.Min.X
      y := maxRect.Min.Y + float64(i)*blindMaxHeight
      height := gfx.Lerp(0, blindMaxHeight, t)
      ebitenutil.DrawRect(screen, x, y, maxRect.W(), height, clr)
   }
}
Here is the end result. The final code > here